Getting Started
Turfgrass Essentials
Sunlight • Air • Water • Nutrients • Temperature
GETTING STARTED ON YOUR NEW LAWN
Prepare the Soil for Success

For healthy, vigorous grass, three vital essentials—air, water, and nutrients—must be in balance and freely available from the soil. Compacted soil restricts the air and water available to the roots, which will inhibit the performance of the grass. Soils that drain poorly or stay wet for long periods will have limited air and can actually drown the grass. Loosen soils by tilling to improve the soil for good nutrient and moisture absorption.
Clay or silt soils will benefit from having sandy soils added to them, while very sandy soils may need to have some organic content added. A “sandy loam” soil is ideal. Most soils in Western Washington will also need to have lime added to improve soil biology and nutrient balance. Loams, sandy loams, and loamy sands, with a pH of 6.0 to 7.0 are the very best soils for producing a beautiful, high-use, low-maintenance lawn.
The minimum depth of quality topsoil needed to avoid ongoing complications is 4 inches. However, for deeper root penetration and the other benefits that it brings, the accepted standard is 6 inches.
Proper soil improvement and site preparation before any planting takes place will pay dividends in the health and quality of the lawn for years to come. Deep roots will allow the lawn to be more drought resistant and use water and nutrients efficiently, resulting in a thick, healthy lawn. A dense and hardy lawn crowds out weeds and offers greater resistance to disease and insects.
Sun and Shade

Grass actually produces its food for growth through the photosynthesis process, not directly from the fertilizer as most people believe. Be aware that areas receiving less than 4-5 hours of direct sunlight on sunny days will produce a less vigorous lawn. Such sites will require more attention, modified maintenance practices and possibly may require seasonal overseeding. Consider using more shade tolerant grasses in areas that have limited sunlight at the time of planting or sodding.
Seasonal Temperatures

Sod can be installed all year around in Western Washington. While winter temperatures are not too cold for acceptable sod establishment, they are too cold for effective seed germination. The appropriate temperature window for seeding in the Puget Sound area is from mid-April through late September. Seeding in too cool of temperature delays germination and allows for inactive seed to be moved with rains and erosion, resulting in an uneven stand of grass, or not germinating at all.
HOW MUCH DO I NEED
Knowing the square footage of your lawn is an important piece of information that will serve you well in the construction of your new lawn and its ongoing care. Not only will you need this information when you order your sod or seed, but also in calculating how much soil you might need, accurate application of lime and fertilizers, and overseeding.

Establish the Final Grade
Rake the area to a smooth surface. The final soil grades should be ½ -1 inch below sidewalks and patios.
Settle the Soil
Loosened or added soil needs to be settled. Roll the area with a water roller no more than half full. Another method is to water the area with a sprinkler with about an inch of water applied. After the soil has settled re-rake to eliminate high and low areas.
SITE PREP FOR SOD AND HYDROSEEDING
The steps for preparing for seed or sod are the same. The more attention given to the preparation of your new lawn, the more success you will have. Site Preparation
Remove Debris and Vegetation
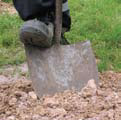
Clear all debris, wood, stones over 2 inches, weeds, and old lawn from the planting area. Any remaining rotting wood, stumps, or vegetation can cause low spots to develop as they decompose.
Establish a Rough Grade
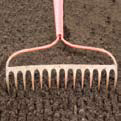
- Fill low spots and level high areas.
- Establish gentle contours or elevation changes.
- Slope away from structures.
- Avoid creating bowls in the grade that might accumulate water.
Initial Tilling

After establishing the rough grade, till to a depth of at least 4-6 inches, even if a tiller was used earlier, to ensure that the soil is loose to an even depth over the entire area.
Add Soil and Soil Amendments
Replace or add topsoil needed to improve the existing site soil or to raise elevations for the final grade. To prevent layering and possible drainage problems till the new soil into the underlying soil. Add lime and other recommended amendments prior to final tilling for thorough incorporation into the root zone.
Caution: Avoid working the soil with a tiller or other equipment in wet conditions. This can ruin soil structure and lead to drainage problems and compaction.
SOD INSTALLATION AND CARE
Be sure to complete your soil and site prep-work prior to having your new sod delivered. Prompt installation on the day of delivery is crucial in warm weather.
Installation
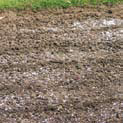
On warm days moisten the soil prior to laying the sod. Be careful not to create a muddy surface. Spread a starter fertilizer on the soil before laying the sod. This allows you to easily see that your application is even. Begin installing turf along the longest straight edge, such as a sidewalk or driveway. If there is no straight edge to work from, you can use a string-line. Place sod so edges fit tightly together, no gaps or overlapped edges. Be careful not to stretch the sod to make it fit.
Stagger seams in a brick-like fashion. Trim excess length on the borders of the lawn with a sharp, serrated-edged knife. After the installation is complete, water the area thoroughly. The soil underneath should be wet to a depth of 6 to 8 inches.
Primary Care
At installation the sod should be watered to the point of being squishy wet. Keep the new sod and underlying soil constantly moist for the several weeks after that. Pay careful attention to maintain adequate moisture on extra warm or windy days. Monitor edges and sod next to driveways and patios, as these areas will dry first. Avoid heavy use of the lawn for the first two weeks to avoid opening seems or developing depressions due to high soil moisture. Allowing the grass to get too long before the first mowing can do considerable damage. When the grass reaches a 2.5 to 3 inch in height, mow it down to a 1.5 to 2 inches.
LAWN CARE GUIDELINES
Watering
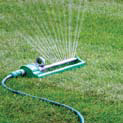
After the initial watering phase, watering cycles can be less frequent but with longer run times for deeper infiltration. This will encourage deeper rooting and less water will be lost to evaporation. As a guide, grass needs one inch of water per week during May through September by either rainfall or irrigation; this can vary due to soil texture, sun exposure or wind conditions.
Some soil conditions will not allow for one inch of water to be applied in a single watering cycle without runoff. In these conditions, apply the first half inch of water one day and the second half inch the next day.
For healthy grass and efficient use of water, irrigate early- to late-morning and avoid afternoon or evening watering. Also see our Watering Tips page.
Fertilization
Growing grass uses nutrients from the soil and those nutrients need to be replaced to maintain the growth and health of your lawn. When grass is actively growing, fertilizer will be needed about every six weeks. In the lawn’s first season we recommend using a balanced fertilizer such as 16-16-16. For established lawns use fertilizers with a nutrient ratio of 4-0-1 (i.e. 23-0-6) applied at the manufacturer’s recommended rate. Avoid excessive fertilization for long term grass health.
Apply lime to the lawn once a year. There is no wrong time to add lime, however, fall is the best time for the application. Lime will keep the soil pH balance, providing good soil biology, nutrient availability, and deter moss. Fertilizer Tips | Liming Your Yard
Mowing
Mow your lawn as needed. Avoid removing more than one third of the height in a single mowing. Northwest grasses should be maintained at a height of 1 ½ to 2 ½ inches. Shorter heights will shorten the root system, increase water demands, and cause the lawn to be more susceptible to weeds and disease. Mowing your turf
SOWING SEED AND CARE
Seeding
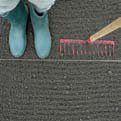
Scratch the soil surface with a rake to provide loose soil to mix the seed into. Spread the seed at the recommended rate (lbs./1000 sq. ft.) with a fertilizer-type spreader. After seeding, lightly mix the seed into the soil with a rake and then roll the seeded area with a lawn roller filled one third with water.
Caution: Avoid working the soil with a tiller or other equipment in wet conditions. This can ruin soil structure and lead to drainage problems and compaction.
Water the newly seeded area thoroughly to a depth of 6 inches. Take care not to water in a fashion to cause puddles or soil movement; this may require multiple short water cycles.
Care
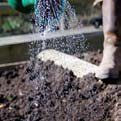
Keep the seeded area constantly moist for the first 30 days. Pay close attention to moisture on extra warm or windy days; these conditions may require multiple light water cycles per day. Two weeks after grass emergence, apply a starter fertilizer to the new lawn at the recommended rate. Mow the new lawn when grass reaches a height of 3 inches. Set the mower height at 1.5 inches.


